
By using this website, you agree to our Terms of Use (click here)

Let's say you need to import beginning inventory balances into Acumatica.
This includes things like Items, Warehouses, Quantities, and Costs.
Personally, I like to import into the Receipts (IN301000) screen since it's simple.
My recommendation with any import is to first enter a few sample lines into the screen, then save the record to ensure that you don't get any error messages:
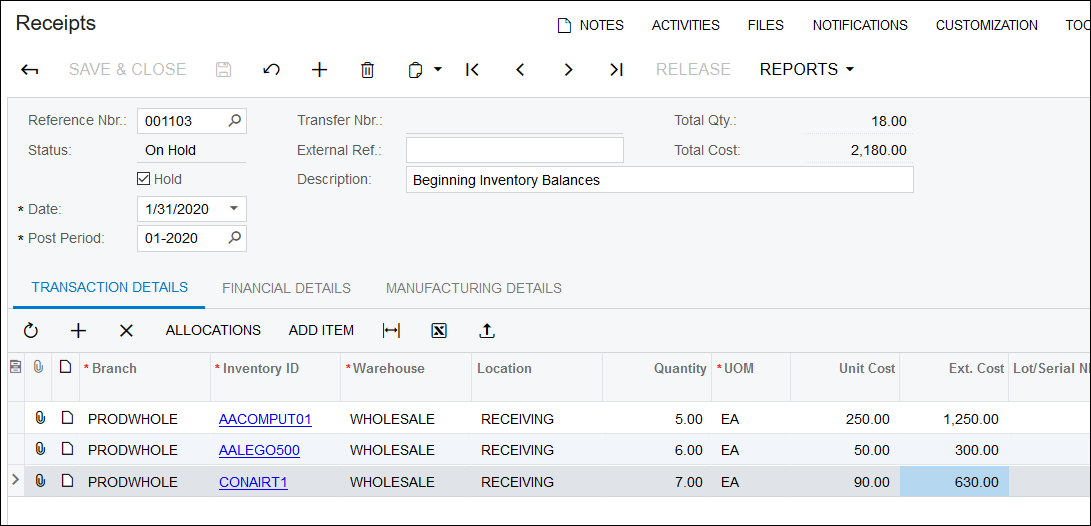
Then, take the data that you entered into the screen manually and create an Excel file with the same data, using the first row in the Excel file for the same field name from the screen in Acumatica:

Note: In the screenshot above, the reason why I'm including Reference Nbr. as a column is because Acumatica uses this column to know when to create a new record and when to add lines to an existing record. The value that you put in this field doesn't matter (I'm using "ONE", but it could be anything) because Acumatica will create its own record identifier. What matters is when the value in this field changes, that's what triggers Acumatica to create a new transaction as opposed to adding another row to the TRANSACTION DETAILS tab for the existing transaction. Since I want to import all inventory balances into one giant Receipt transaction, I'll use the same value in the Reference Nbr. column for all rows in the Excel file.
Now you need to create an Import Scenario in Acumatica. The easiest way to do this is using the Import by Scenario (SM206036) screen.
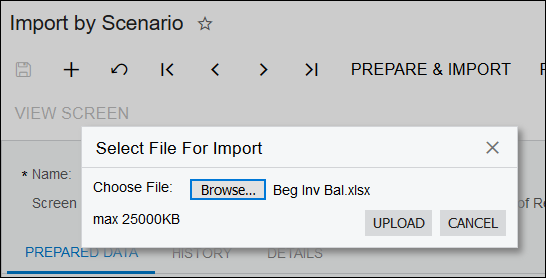
Click the + button on the Import by Scenario (SM206036) screen, browse to your Excel file, and click the UPLOAD button:
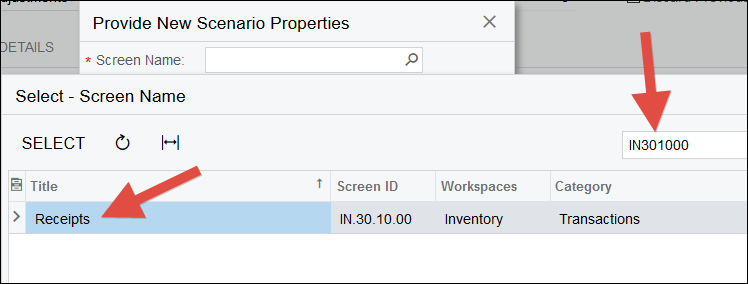
In the Screen Name field, the quickest way to ensure that you select the correct screen is to click the magnifying glass and search for the Screen ID (IN301000 in this case):
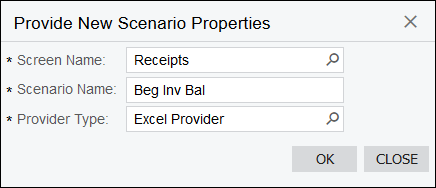
The Scenario Name will default to something, but you can change it. I personally like changing it to match the name of my Excel file (which means I need a meaningful Excel file name to begin with):
Once you click OK, you can then go to the MAPPING tab and map the fields one by one by populating the Target Object and Field Name fields for every row in the grid. This is easy if you kept the Excel column names as displayed in the Source Field / Value field the same as the Acumatica screen field names:
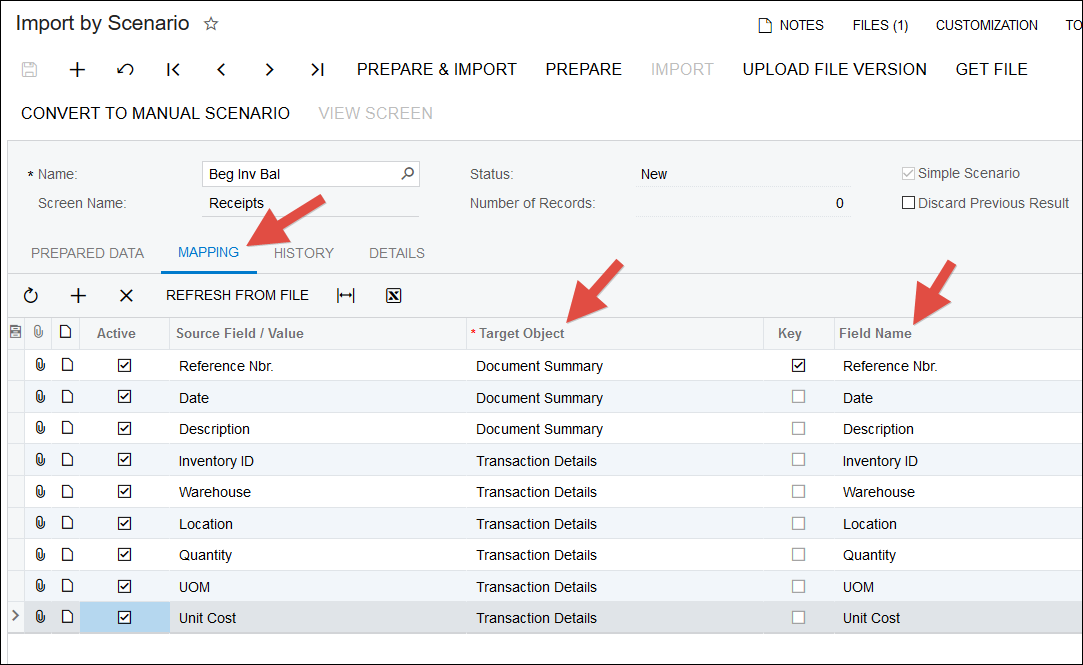
Note that by using the Import by Scenario (SM206036) screen with the MAPPING tab, we took a shortcut. Acumatica automatically created something in the Data Providers (SM206015) screen and attached our Excel file. Acumatica also automatically created something in the Import Scenarios (SM206025) screen based on what we did in the MAPPING tab on the Import by Scenario (SM206036) screen. If you want to make more advanced changes to the Import Scenario using the Import Scenarios (SM206025) screen, go for it, just make sure to click the CONVERT TO MANUAL SCENARIO button on the Import by Scenario (SM206036) screen first to make the MAPPING tab go away so you won't accidentally mess up your changes later.

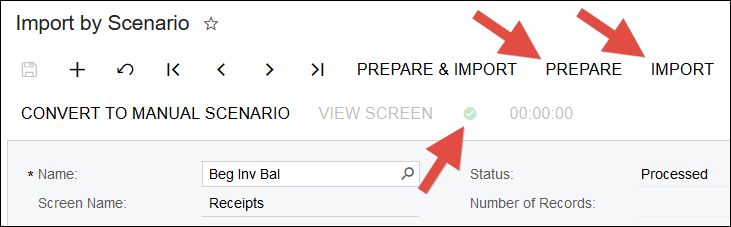
Now all we need to do is click the PREPARE and IMPORT buttons on the Import by Scenario (SM206036) screen, then wait for the green checkmark to appear indicating that the import has completed successfully:
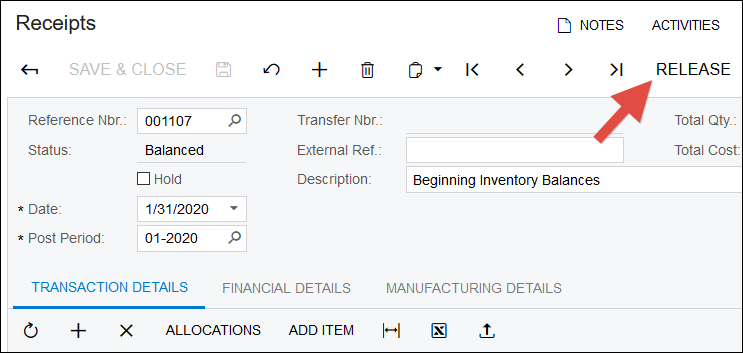
Make sure to review the imported data on the Receipts (IN301000) screen before you click the RELEASE button to post the transaction:
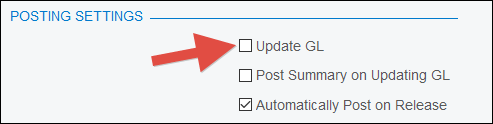
One last thing to note is the General Ledger effect. Since most people import the Inventory General Ledger value as part of their GL Trial Balance load, we don't want this beginning inventory balance import to effect the General Ledger because that would double-count the inventory dollars.
There are two ways to do this:
1. Before you press RELEASE to post the transaction, uncheck the Update GL checkbox in the Inventory Preferences (IN101000) screen to prevent the transaction from posting into the General Ledger:
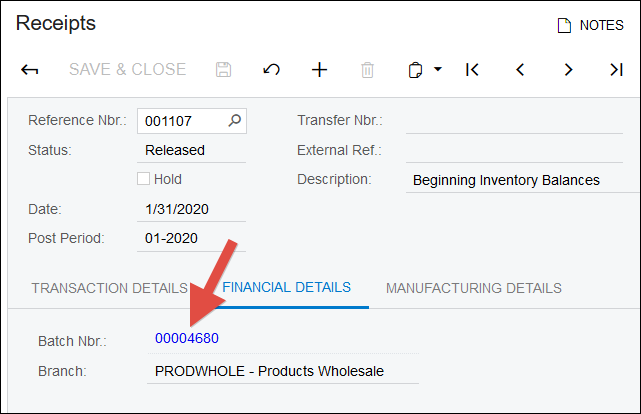
2. Leave the Update GL checkbox checked and let the transactions on the Receipts (IN301000) screen create a journal entry when you press the RELEASE button, then open the journal entry using the hyperlink in the Batch Nbr. field on the FINANCIAL DETAILS tab:
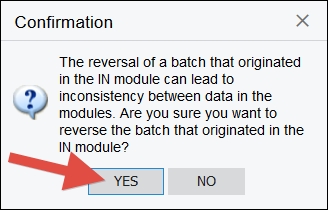
And use ACTIONS -> Reverse Batch to create a reversing journal entry:

Click YES to the warning:
And RELEASE the automatically created reversing journal entry:

I personally prefer this second method because then I don't wonder later why a particular transaction didn't generate a journal entry. I also then don't have to remember to re-check the Update GL checkbox.